视频链接
工具介绍
### DIALOGUE TOOLS
- Twine
- Ink
- Fungus
- Yarn Spinner
- Others/DIY
Comparison of tools

- Twine
- 很容易上手
- 但不容易扩展(只适用于小文本/轻叙事)
- Yarn Spinner
- 介于二者之间
- 也易于上手
- 也具有较好扩展性
- Ink
- 难于上手
- 高扩展性、多特性
why yarn spinner
- 用于对话的脚本语言
- 就像写剧本一样,有场景和演员提示
- 容易写多分支剧情线
- 一开始是为《林中之夜》(Night in the Woods)构建的
- 被用于多个游戏
how to use
make a visual novel
什么是 visual novel
- 常用于动画游戏、约会模拟、类 RPG 游戏
- 用于主要机制是基于对话/选择的游戏类型
- 十分适合用 yarn spinner 构建
特点
- 管理资源
- 构建场景
- 没有物理或移动
示例
前置介绍
goals
- 做一个小型 sci-fi 游戏
- 在 unity 配合使用 Yarn Spinner
- 在 vs code 里面编辑
已有素材
简单场景
3 个人物模型
一些纹理和动画
素材来源
- kenney.nl
- github.com/thesecretlab/SpaceJourney
任务清单
- 下载安装 yarn spinner
- 创建基本的 yarn 脚本并 hook it up
- 构建故事结构和逻辑
- 设置场景中的多个角色和地点
- 润色
- 用最终的故事来替代对话框里的内容
主要会涉及到的内容
- 分支对话
- 基于变量的选项
- 相机、角色和转场的自定义需求
开始动手
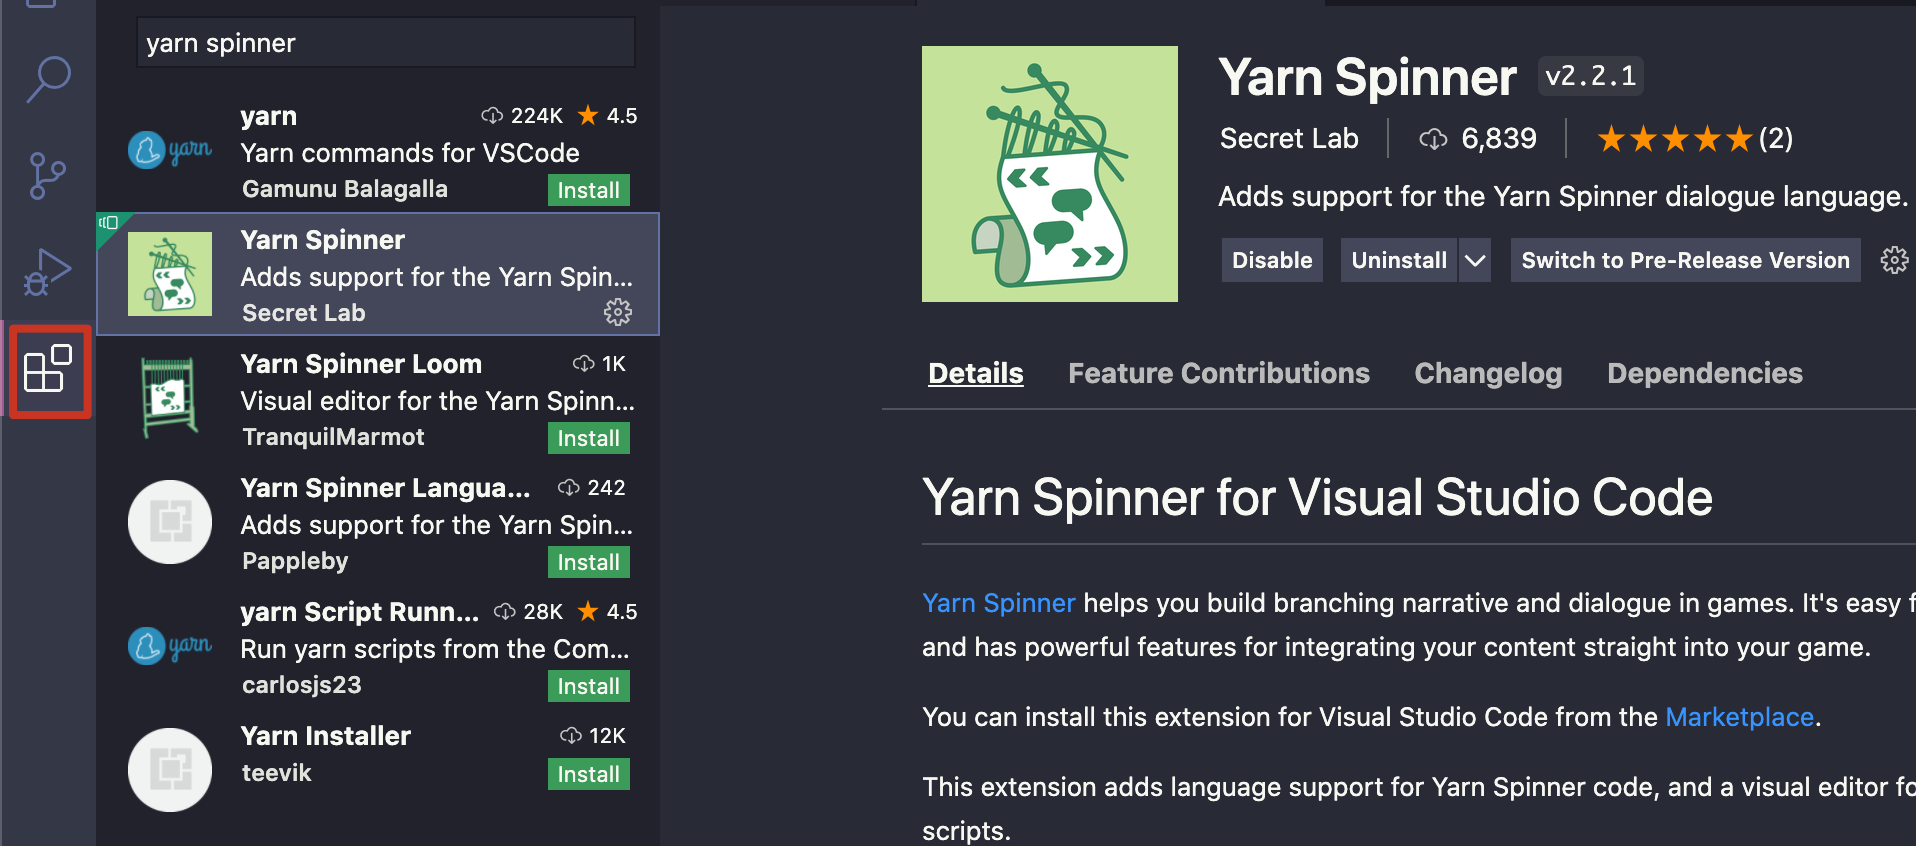
下载安装 yarn spinner
- 到 github 链接 中跟随说明
- 创建 unity 项目
- 加入 yarn spinner 包
- 导入素材的 unity package
- 到 vscode 中安装相应插件 - Yarn Spinner
创建基本的 yarn 脚本并 hook it up
导入素材
前面已经导入了 space journey 的 unity 包
创建并链接脚本
打开 scene 文件夹下的 start point
来到 Dialogue 文件夹下,右键 Create - Yarn Spinner - Yarn Script 并命名为 Space Journey
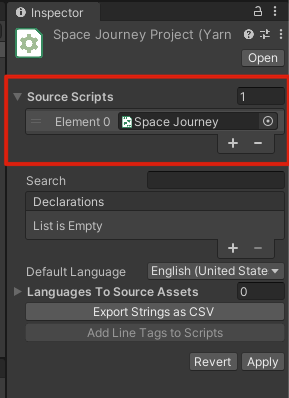
同一文件夹下,右键 Create - Yarn Spinner - Yarn Project 并命名为 Space Journey Project
在构建更大型的项目时,会用到多个 yarn script,建议使用多个脚本而不是只使用一个脚本来进行更大规模故事的构建
将刚刚创建的 script 加入到 刚创建的 project 中并点击右下角的 Apply
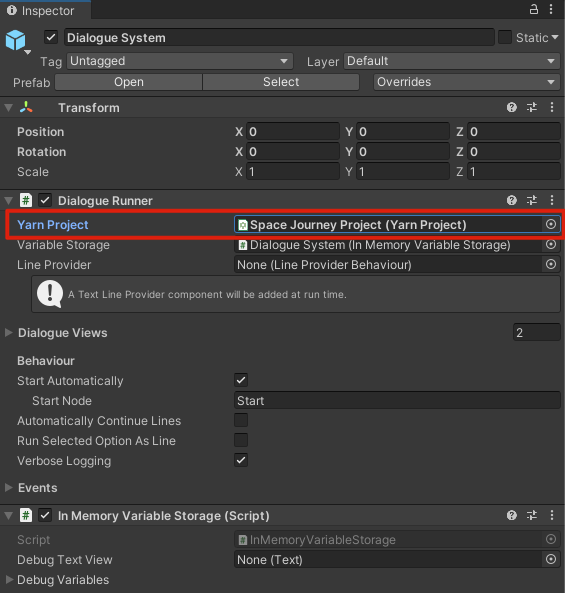
添加对话系统
找到 Packages/Yarn Spinner/Prefabs/Dialogue System 将其加入场景中
将之前的 project 赋值给 Dialogue System 的相应位置
构建故事结构和逻辑
故事背景
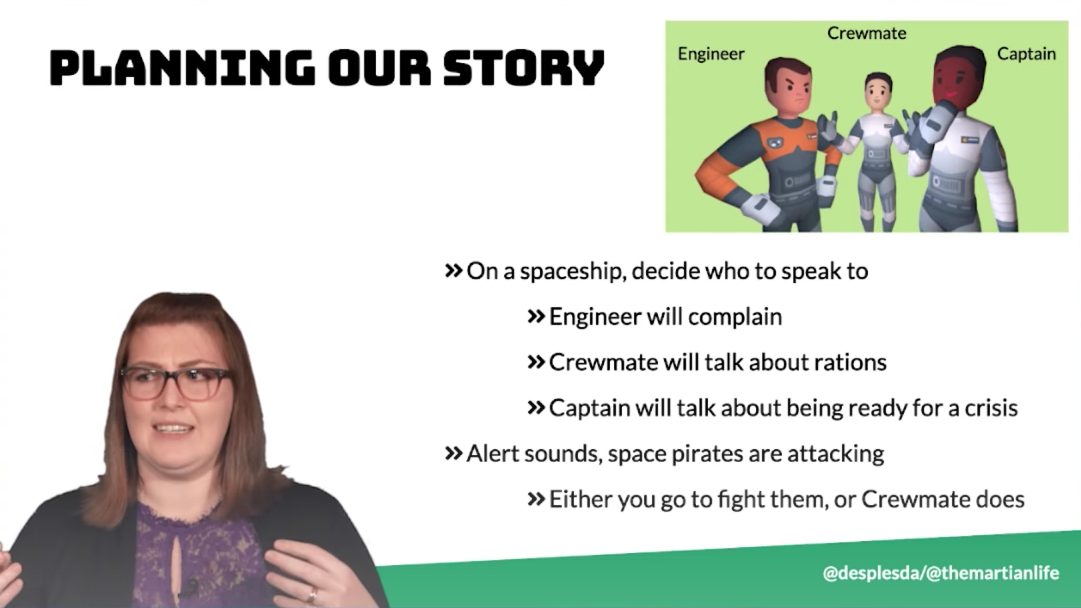
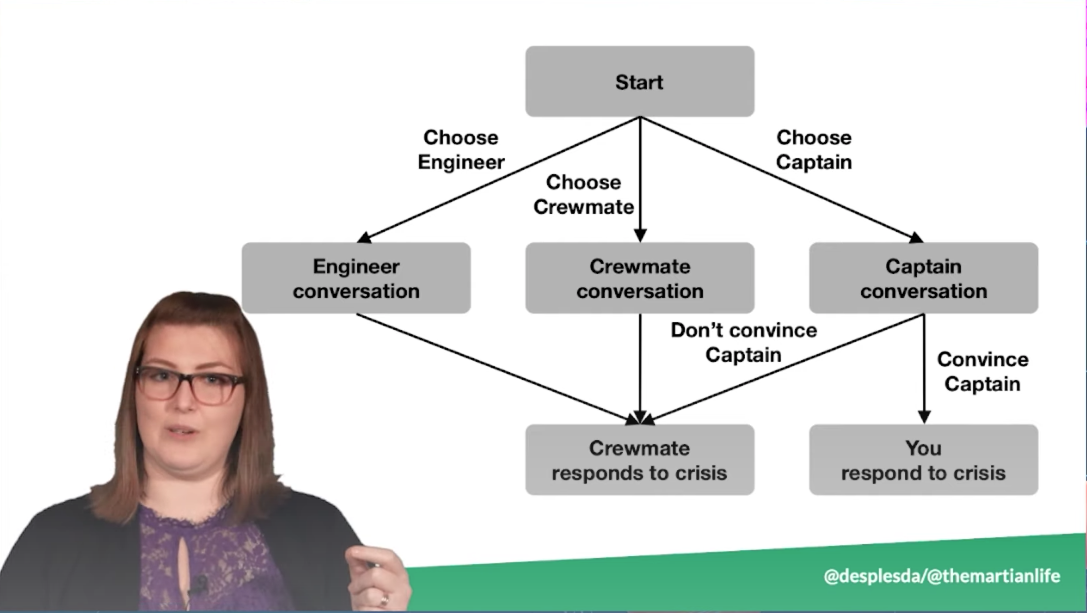
- 在飞船上,可以和三人中的一个对话
- 工程师 - 会抱怨
- 船员 - 谈论配给
- 队长 - 谈到应对危机的准备情况
- 可以说服他你准备好了
- 或者没能说服
- 警报声 - 飞船遇袭
- 要是前面说服队长你准备好了 - 就会派你去
- 否则会派船员去
前面这小部分在视频中被放到
创建基本的 yarn 脚本并 hook it up前面了,但我觉得应该放这里比较合适
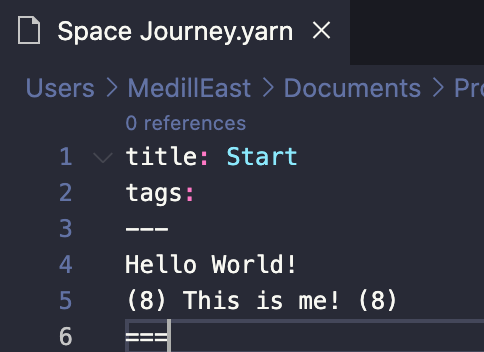
测试
用 vscode 打开脚本文件后开写!
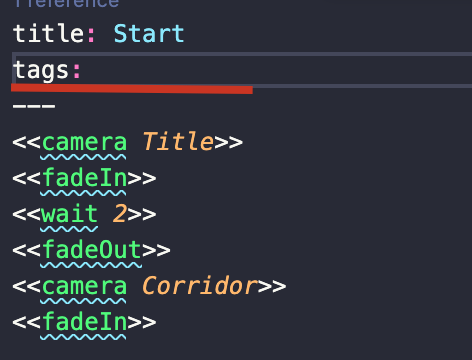
注意设置 title 为 Start
yarn 每次会读取一行
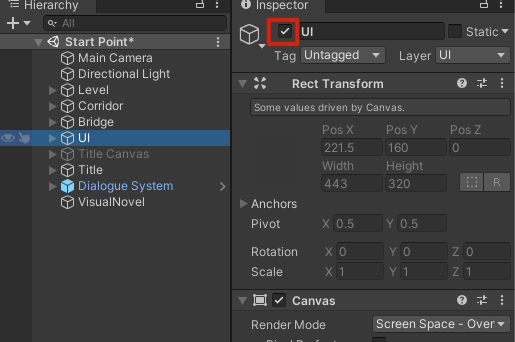
- 预览
- 回到 unity 中,deactive 场景中的
UI和Title Canvas
- 回到 unity 中,deactive 场景中的
- run!


构建脚本
-> 在 yarn 脚本中意味着不同的选项分支
title: Start
tags:
---
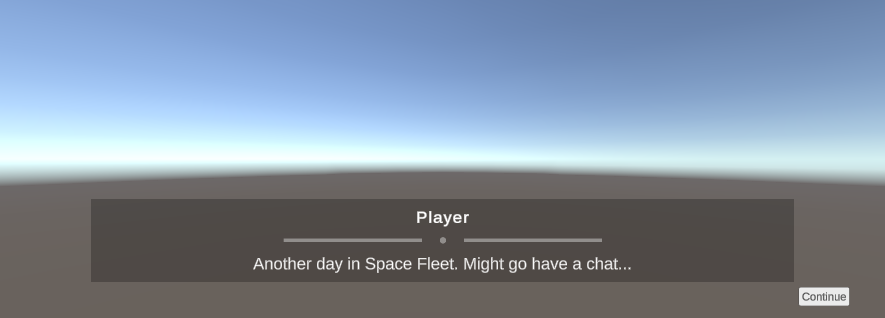
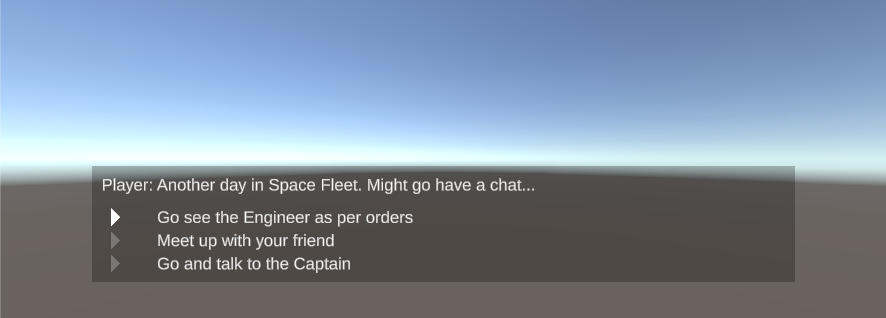
Player: Another day in Space Fleet. Might go have a chat...
// pick a person to speak to
-> Go see the Engineer as per orders
Engineer: Hello! I am the Engineer.
-> Meet up with your friend
Crewmate: Hello! I am your Cremate.
-> Go and talk to the Captain
Captain: Hello! I am the Captain.
===

采用 node 跳转
个人感觉类似函数吧,可以让结构更加紧凑,调用更加方便
title: Start
tags:
---

Player: Another day in Space Fleet. Might go have a chat...
// pick a person to speak to
-> Go see the Engineer as per orders
  <<jump TalkToEngineer>>
-> Meet up with your friend
  <<jump TalkToCremate>>
-> Go and talk to the Captain
  <<jump TalkToCaptain>>
===

title: TalkToEngineer
---
Engineer: Hello! I am the Engineer.
===
title: TalkToCremate
---
Crewmate: Hello! I am your Cremate.
===
title: TalkToCaptain
---
Captain: Hello! I am the Captain.
===
添加谈话后的跳转 - 敌袭!
添加新的 node BridgeEnding 然后在之前的每个谈话分支后面加上 <<jump BridgeEnding>>
title: Start
tags:
---
Player: Another day in Space Fleet. Might go have a chat...
// pick a person to speak to
-> Go see the Engineer as per orders
<<jump TalkToEngineer>>
-> Meet up with your friend
<<jump TalkToCremate>>
-> Go and talk to the Captain
<<jump TalkToCaptain>>
===
title: TalkToEngineer
---
Engineer: Hello! I am the Engineer.
<<jump BridgeEnding>>
===
title: TalkToCremate
---
Crewmate: Hello! I am your Cremate.
<<jump BridgeEnding>>
===
title: TalkToCaptain
---
Captain: Hello! I am the Captain.
<<jump BridgeEnding>>
===
title: BridgeEnding
---
// everyone reports to the bridge
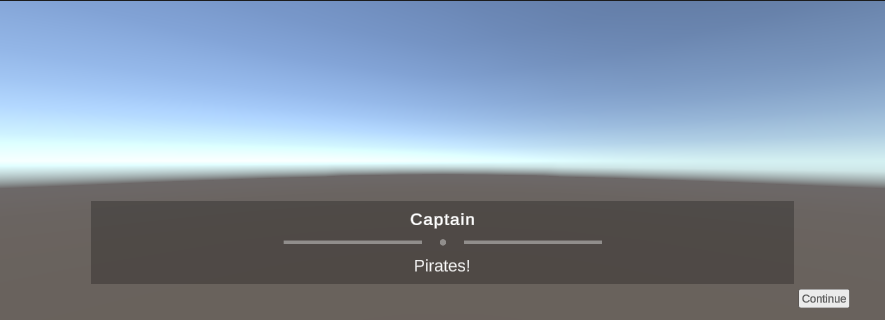
Captain: Pirates!
Player: Oh no!
Captain: Cremate, go deal with those pirates!
Cremate: Yes, Captain.
===
添加不同分支结局
- 若是选择和队长交谈 需要说服他你准备好了
- 这里引入了变量的用法
$away_mission_readiness- 变量以
$开头 - 数值变量初始值为 0
- 变量以
- 为节省篇幅,后面只展现有改动的部分
===
title: TalkToCaptain
---
Captain: Hello! I am the Captain.
Player: I want to talk to go on more missions.
Captain: Do you think you are ready?
-> Yes
  <<set $away_mission_readiness += 1>>
  // if so, ask again
  Captain: Really?
  -> ..yes?
    <<set $away_mission_readiness += 1>>
  -> Actually, no.
-> No
// now go to the ending
<<jump BridgeEnding>>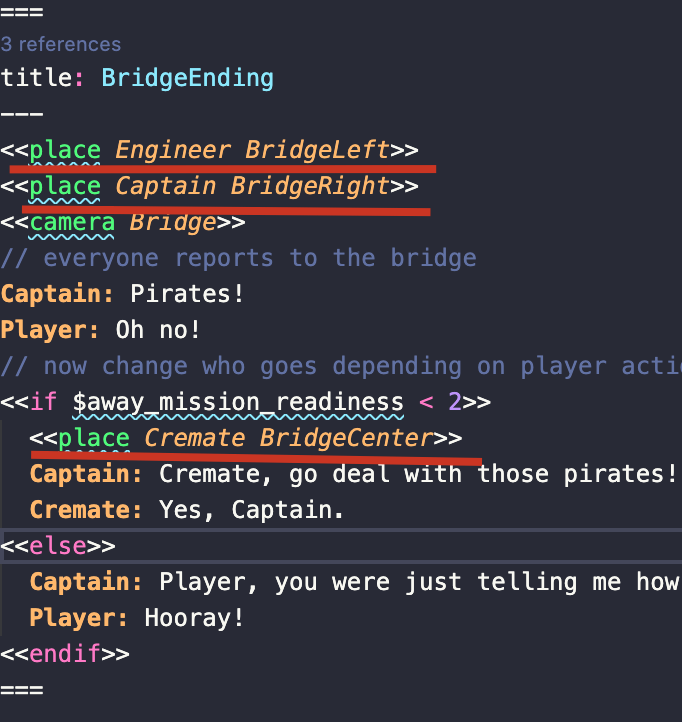
===- 设置不同结局
- 只有选择和船长谈话,并说服他你准备好了(变量值为 2)的情况下才会跳转到新结局
===
title: BridgeEnding
---
// everyone reports to the bridge
Captain: Pirates!
Player: Oh no!
// now change who goes depending on player actions
<<if $away_mission_readiness < 2>>
Captain: Cremate, go deal with those pirates!
Cremate: Yes, Captain.
<<else>>
Captain: Player, you were just telling me how ready for this you are. Go deal with those pirates!
Player: Hooray!
<<endif>>
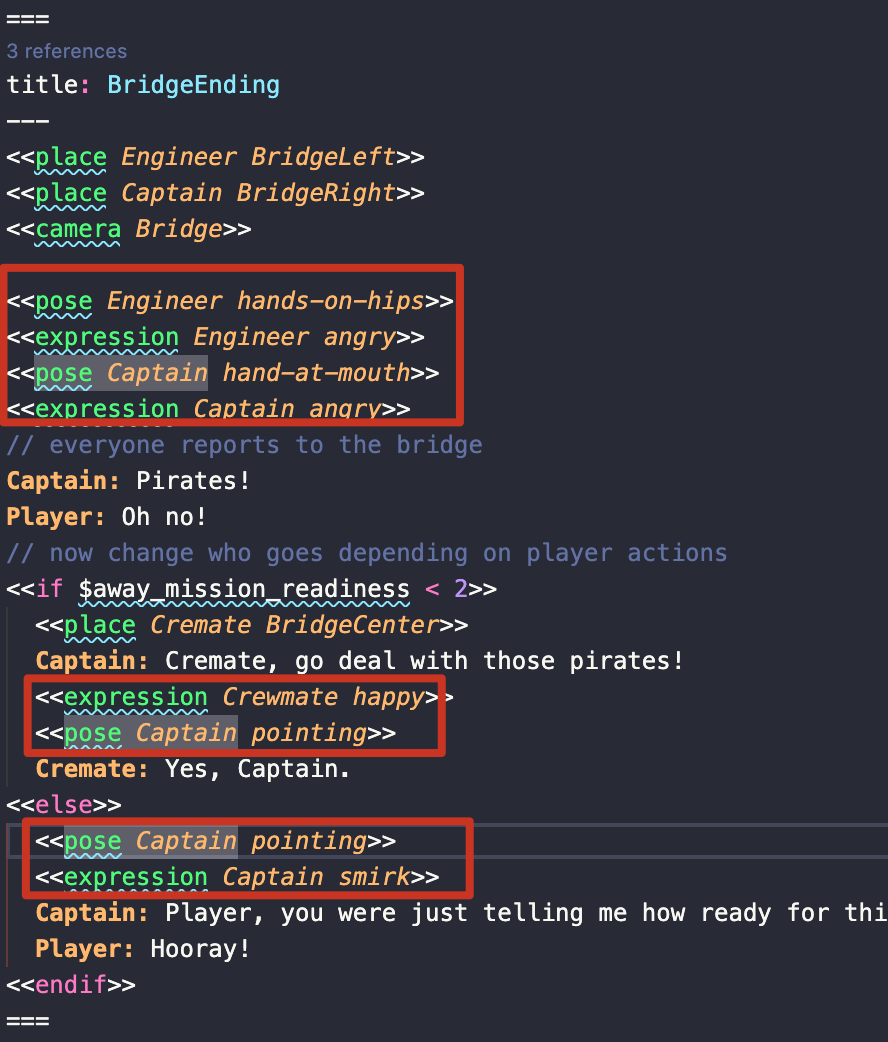
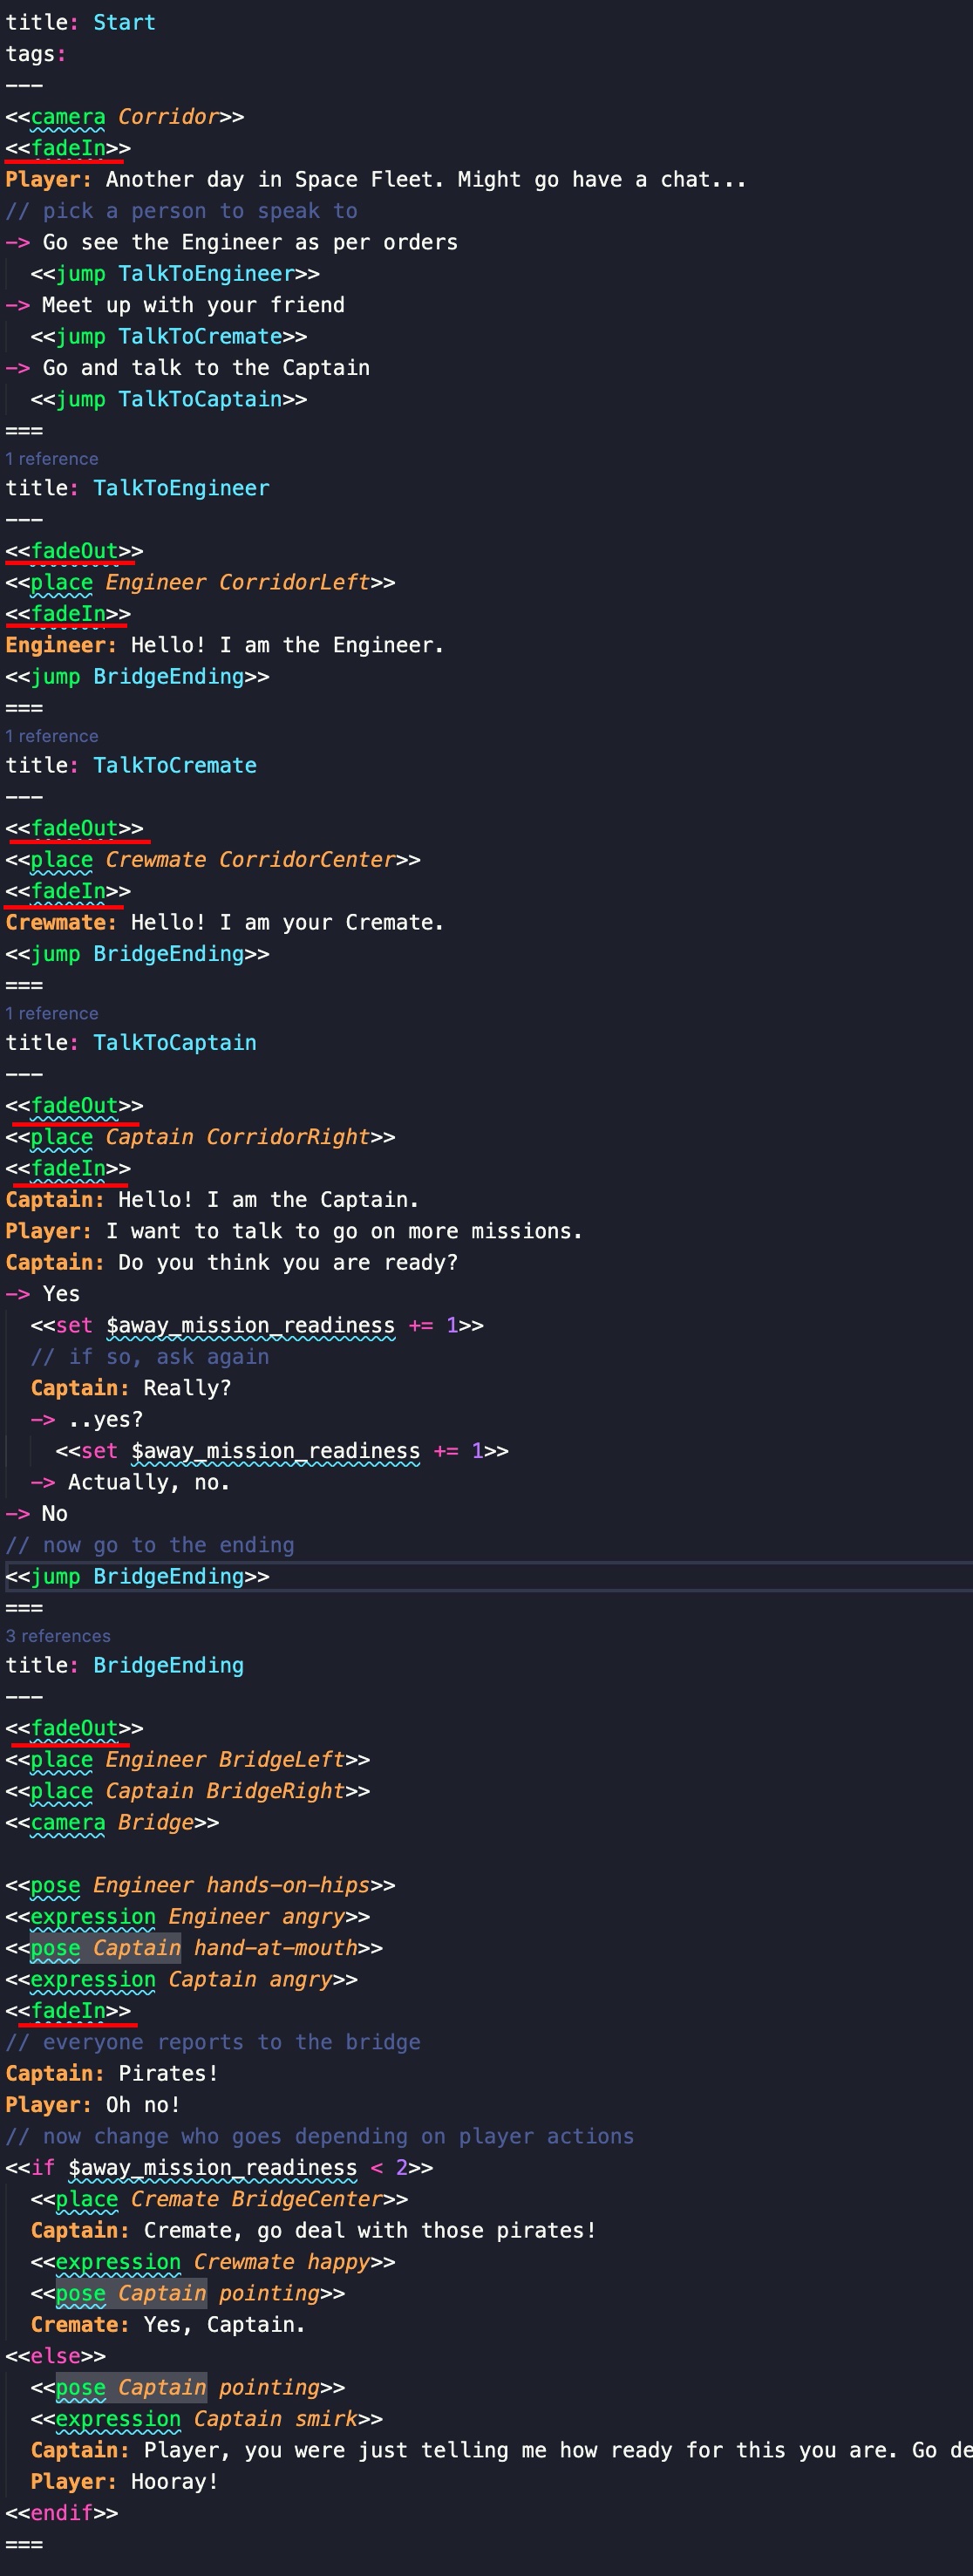
===设置场景中的多个角色和地点
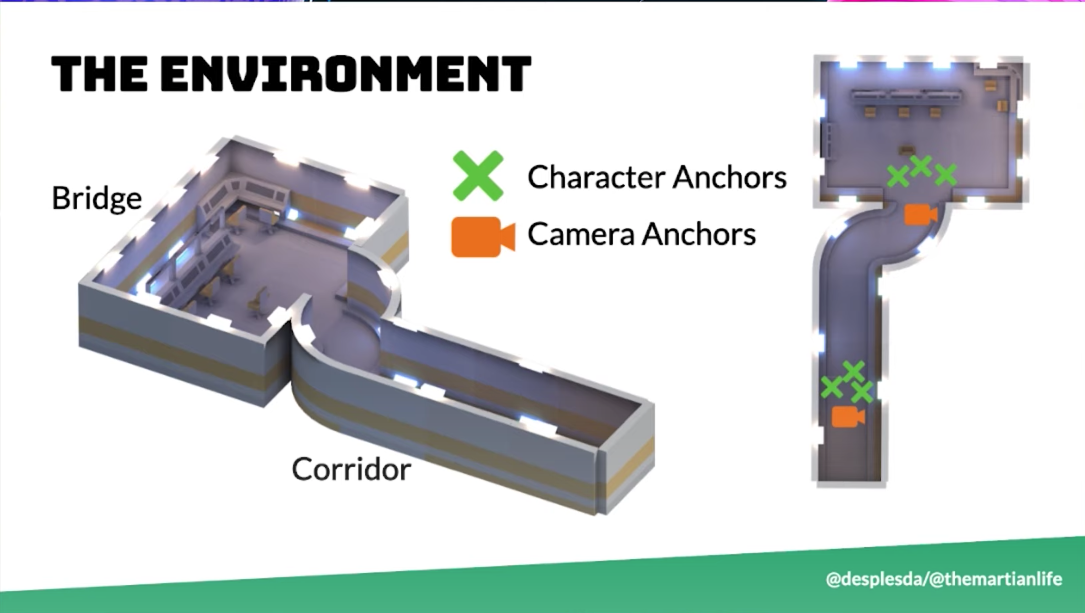
设置摄像机
利用 yarn spinner 的 command 特性来安排摄像机
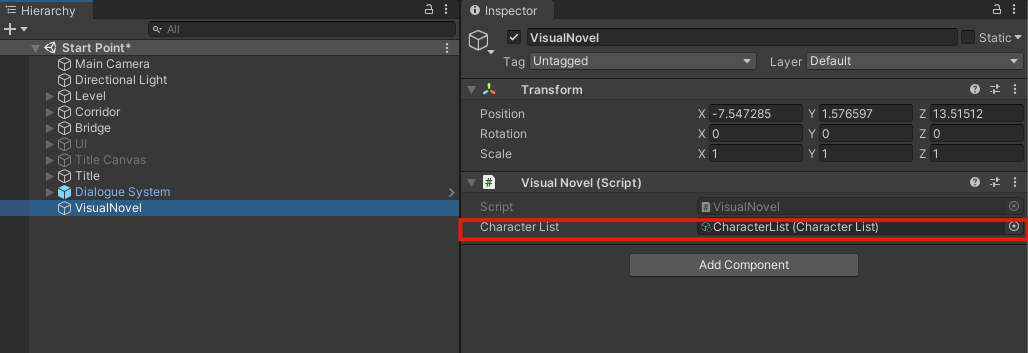
- 在场景中创建新的 gameobject 并命名为
VisualNovel - 找到
Scripts/VisualNovel并添加到刚创建的 obj 上
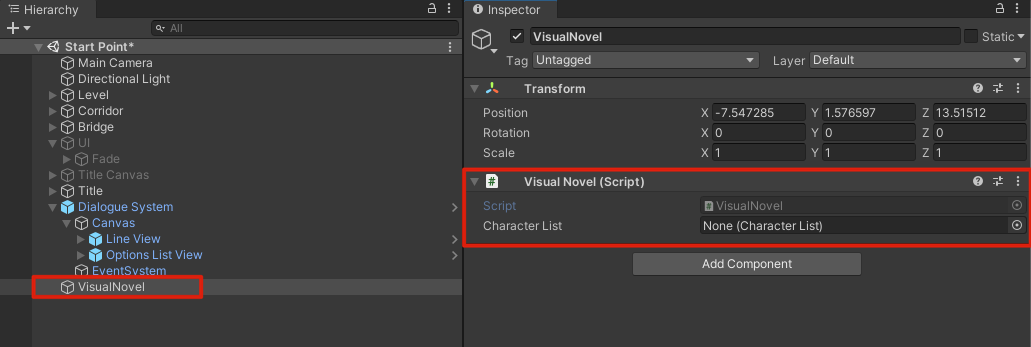
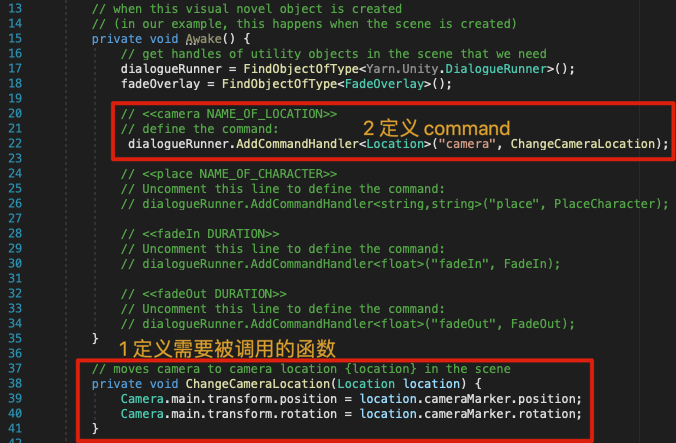
- 打开
VisualNovel.cs取消第二步处的注释即可定义 command
- 到
Space Journey.yarn中添加切换摄像机的代码
场景摄像机最开始的位置应该在 Corridor 处,所以添加代码
<<camera Corridor>>
场景摄像机最后会在 Bridge 处,所以添加代码
<<camera Bridge>>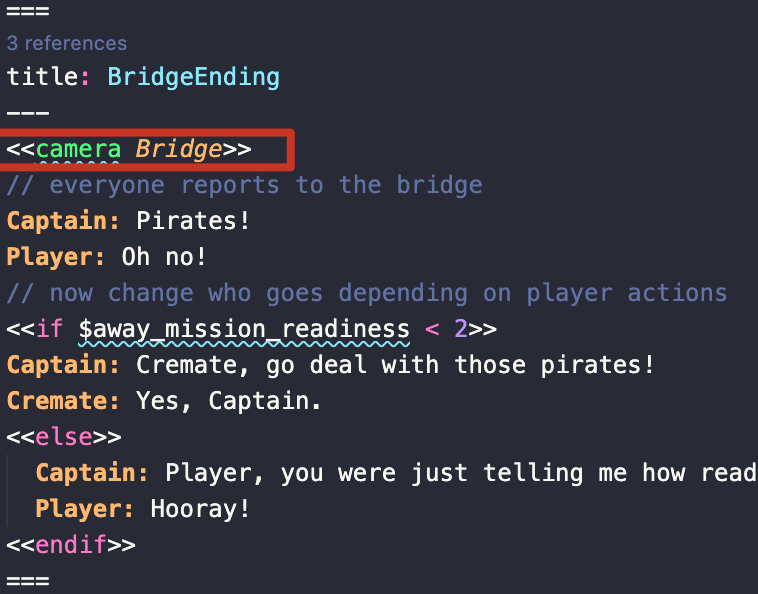
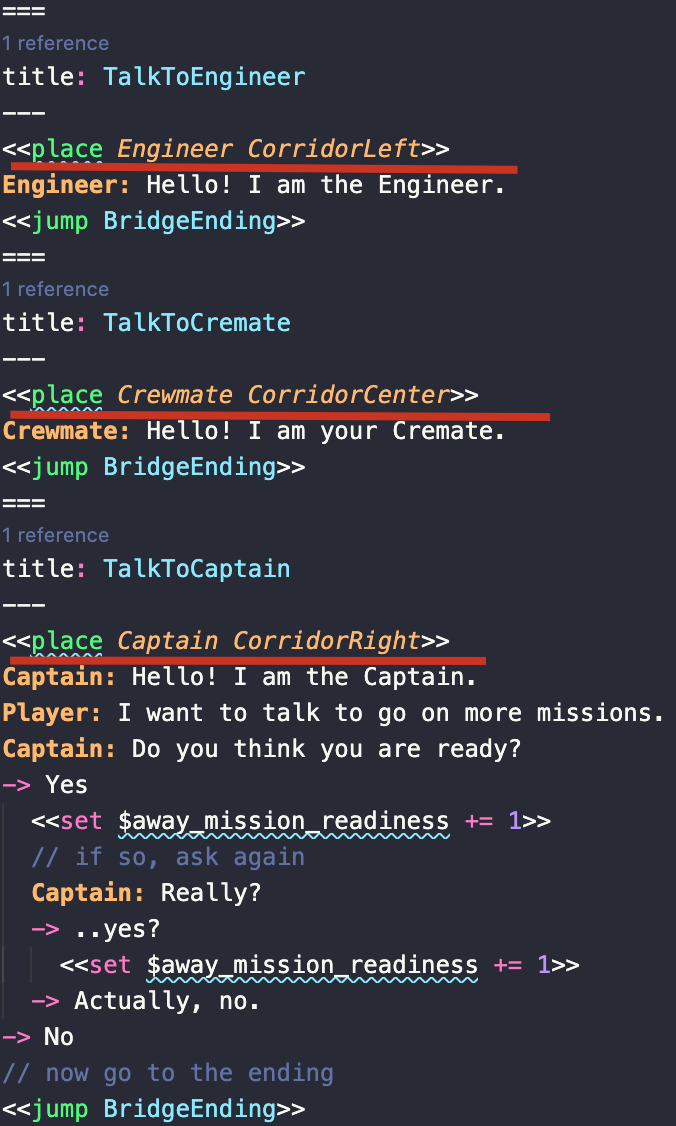
设置角色
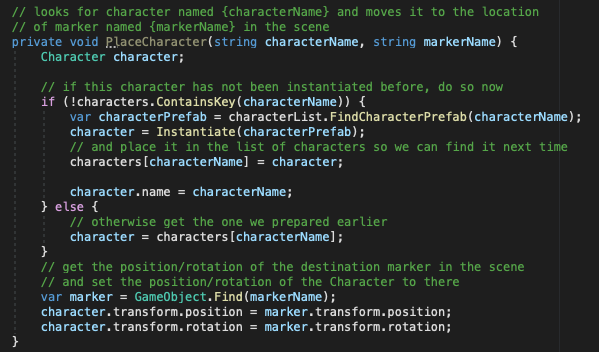
可以看到 VisualNovel.cs 中有关于放置角色的代码,这部分代码可以帮助我们在场景中创建角色 并放置到预设的位置:
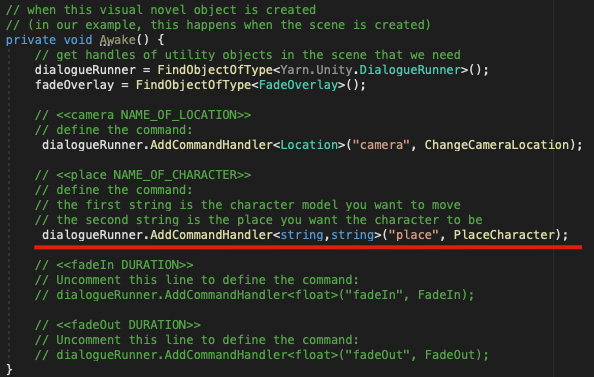
然后需要在 VisualNovel.cs 的 Awake 部分中定义相关的 command,第一个 string 是你想要移动的角色模型,第二个 string 是想将其移动到的地点
之后在各场景中放置角色模型
在使用之前 还需要为 Visual Novel 指定 Character List
让角色在不同情境呈现不同状态(表情)
这样细粒度的操作需要从角色上的脚本着手,Character.cs 中包含了设置位置和表情的函数
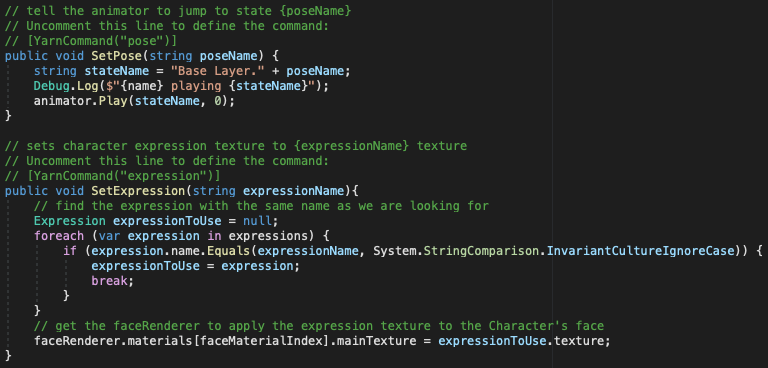
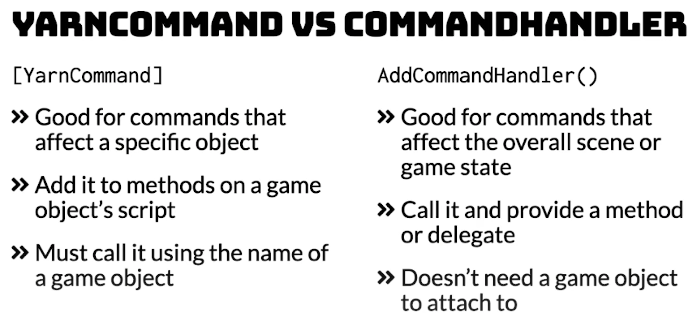
这里对比了 yarn command 和 command handler 的区别
简言之就是 Yarn command 可以处理更细粒度的行为
command handler 更适用于处理更粗粒度 如场景中的整体变化
所以在相应函数之前加上 yarn commend 的定义语句
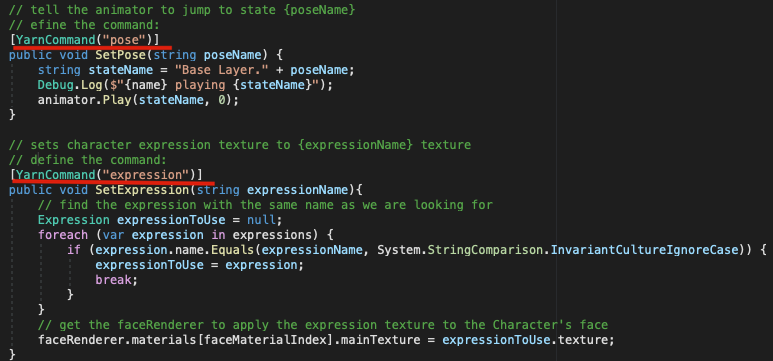
之后就可以在 yarn 脚本中调用了
润色
用淡入淡出方式来切换场景
因为 fadein fadeout 是全局行为,所以将其添加为 command handler
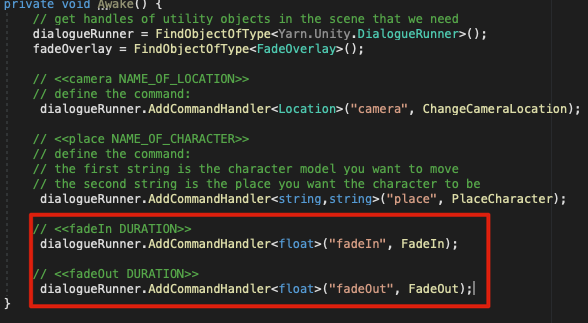
他们调用的是下面定义的相关函数
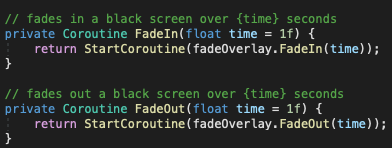
然后在 yarn 脚本中相应位置来调用 fade 函数
记得把场景中之前 deactive 的 UI object 重新勾选出来
加入标题
在 yarn 脚本最开始部分引入 展示标题部分的代码

wait 函数是 yarn 自带的函数,功能如其名,等待,其参数单位为秒
记得把之前 deactive 的 title 重新勾选
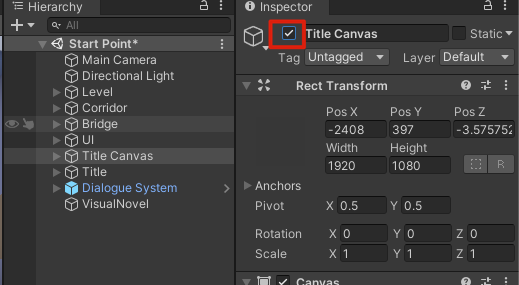
然后 play 时就可以看见帅气标题了

用最终的故事来替代对话框里的内容
前面的都是机制教学 理解了前面的内容 就可以直接用他们构建好的故事来替代整个故事
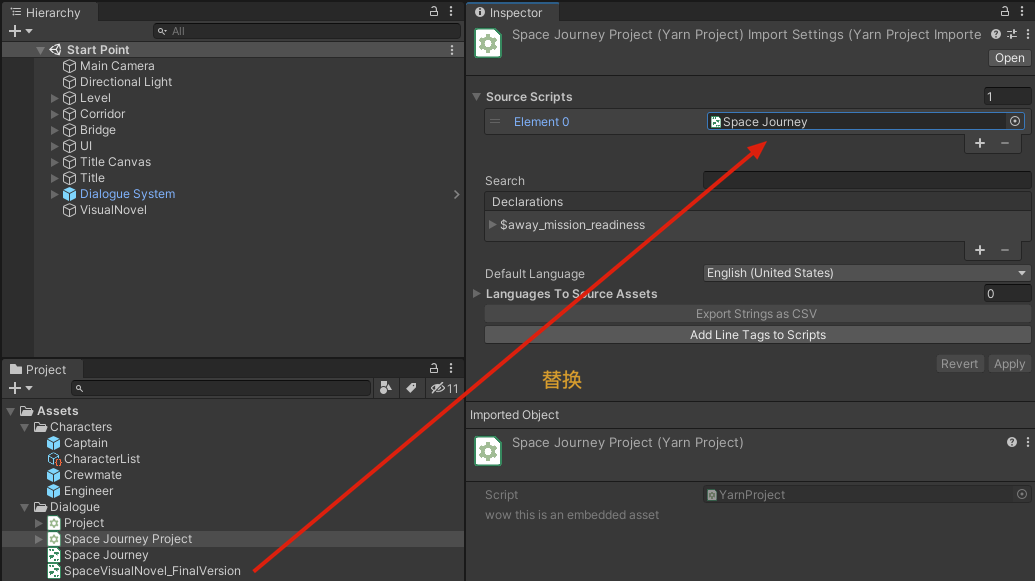
直接运行会有报错,对比了一下两个 yarn 文件 发现他们给的这个最终版本最前面少了一行 tags,加上之后就可以正常运行了:
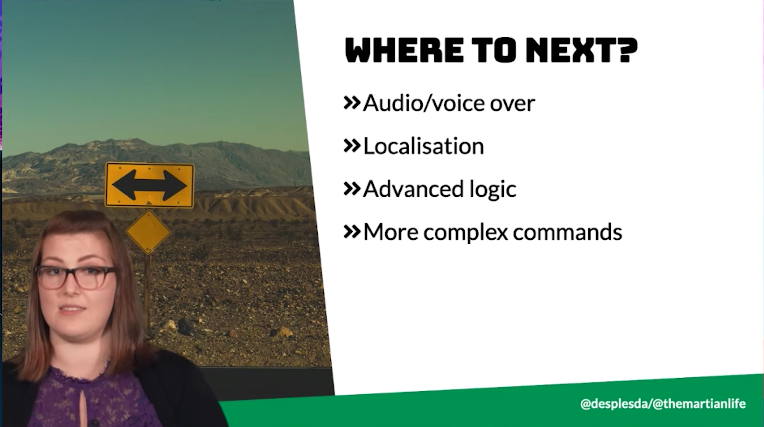
where to next
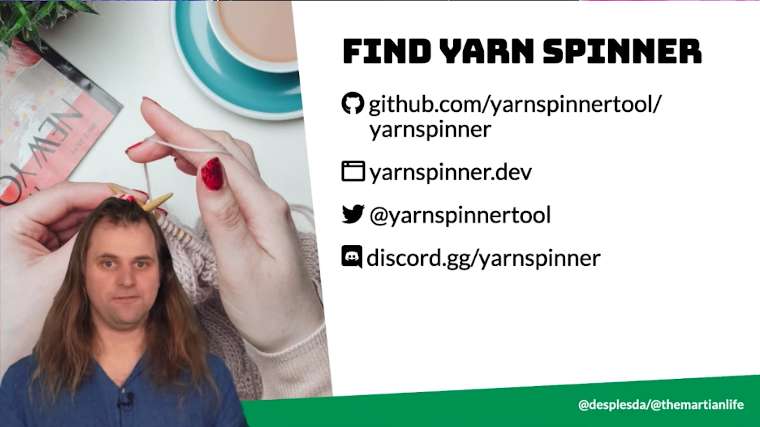
find yarn spinner
thanks!